First, head over to app.keymetrik.com and create your account. You’ll need a valid email address, your name and a secure password.
Once logged in you see that your project has the name default. You can change this name by navigating to the settings through the sidebar.
Chose the tab Project and here you can change your name and the expected customer lifespan in years.
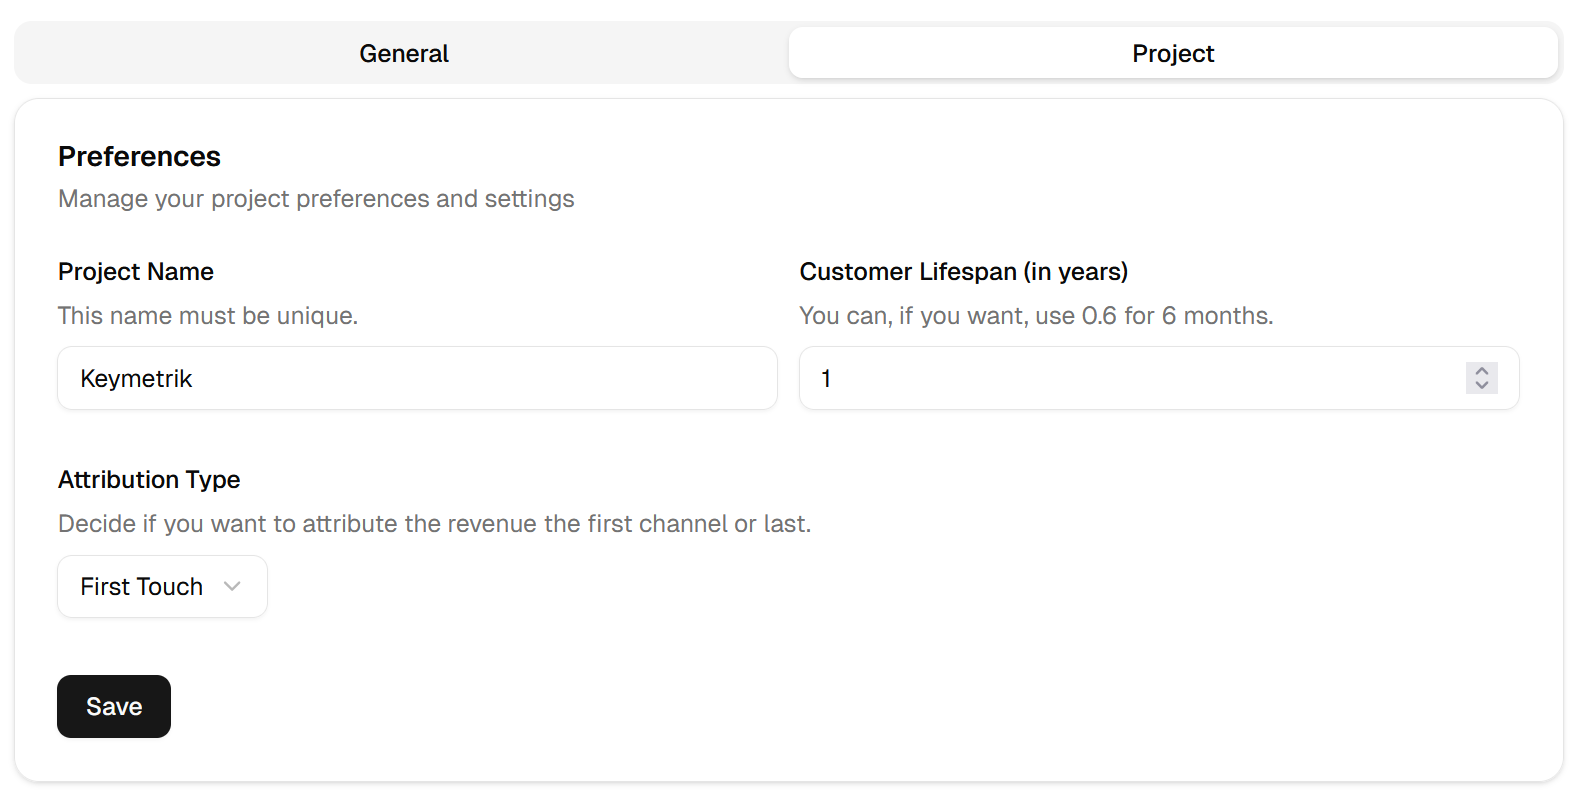
As well as the attribution type, which is set to first touch as standard value. This means all your customers and their revenue attributed to the first channel they used to visit your site. Whereas last touch does the opposite. Under the General tab you can change your preferred currency.
Add the script
To add the script to your website use the snippet that can be copied under the Project tab.

Paste this script snippet into the head of your HTML layout of your website, like this:
<html>
<head>
  <script defer src="https://cdn.keymetrik.com/script.js" data-project-id=""  data-domain="">
  </script>
</head>
</html>
What’s the job of this script? Every visitor that arrives on your website gets a cookie. This cookie assigns a unique identifier to your visitor.
The cookie name is _keymetrik_id and is only set on your site with a lifetime of 30 days. Your visitors will not be tracked through this cookie when he visits other sites. The cookie is only designed for your page and doesn’t use any personal identifiable data, it’s just a random UUID that’s unique for each visitor.
Creating API keys
Through the sidebar open API Keys.
Here you can create a new key by providing a name and validity period. You will need them to purchases.
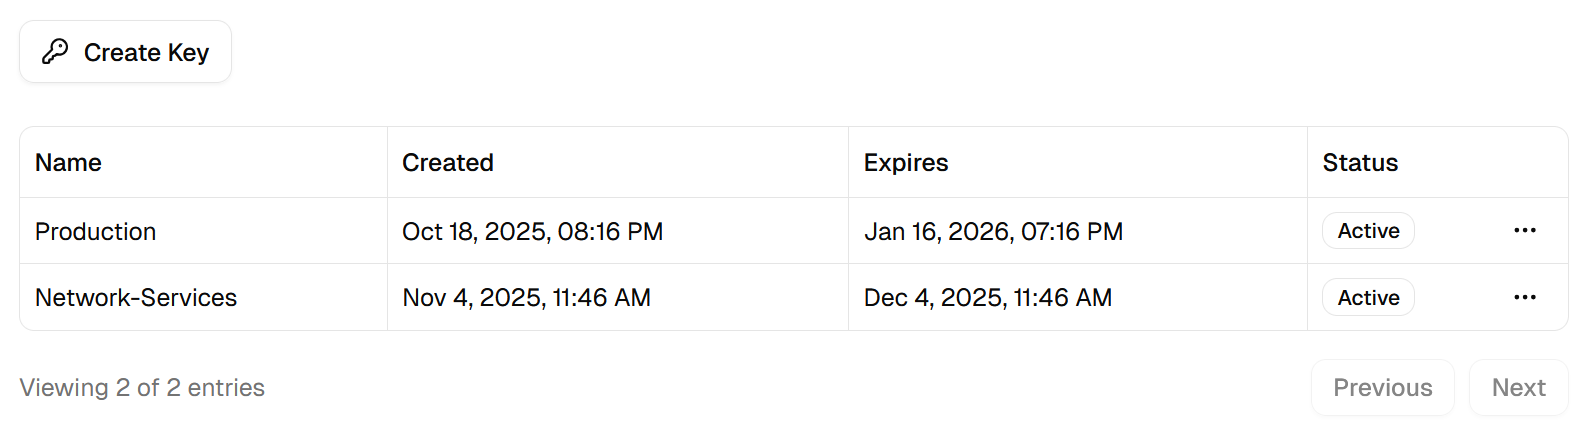
Make sure to copy the generated key because you’ll not see it again.
Add leads
Decide where you want to add leads on your website. For example the newsletter signup form, account form, etc. For this, You can use the following function to track leads on your homepage.
'use server'

import { cookies } from "next/headers";

export async function trackLead() {
  const cookieStore = await cookies();
  const cookie = cookieStore.get("_keymetrik_id");

  const payload = {
    visitorId: cookie ? cookie.value : null,
    email: '[email protected]',
  };

  try {
    await fetch("https://api.keymetrik.com/v1/leads", {
      method: "POST",
      headers: {
        "Content-Type": "application/json",
        "Authorization": `${process.env.KEYMETRIK_API_KEY}`,
      },
      body: JSON.stringify(payload),
    });
  } catch (error) {
    console.error(error);
  }
}
And that’s it. The lead will be visible in your dashboard with his name and email.
What if the cookie is not present?
If the user has not given you consent for the cookie, but you still want to track him via Keymetrik you can do so by omitting the visitorId in the payload. Or you can pass null as visitorId, as you can see in the example above: If the cookie is not present we just pass null.
Keymetrik will assign a random UUID for this lead and use (direct) as attribution channel.
Add purchases
Same as adding leads, you can use the following snippet.
const payload = {
  email: "[email protected]",
  amount: 19.99,
};

await fetch('https://api.keymetrik.com/v1/purchases', {
  method: "POST",
  headers: {
    "Content-Type": "application/json",
    "Authorization": "YOUR_KEY",
  },
  body: JSON.stringify(payload),
});
Just provide the amount to track any purchase. Here, replace the API key.
Adjust investments
For each automatically tracked channel you have to input your investment. Head over to Channels, click on the hamburger menu and select Edit Investment.
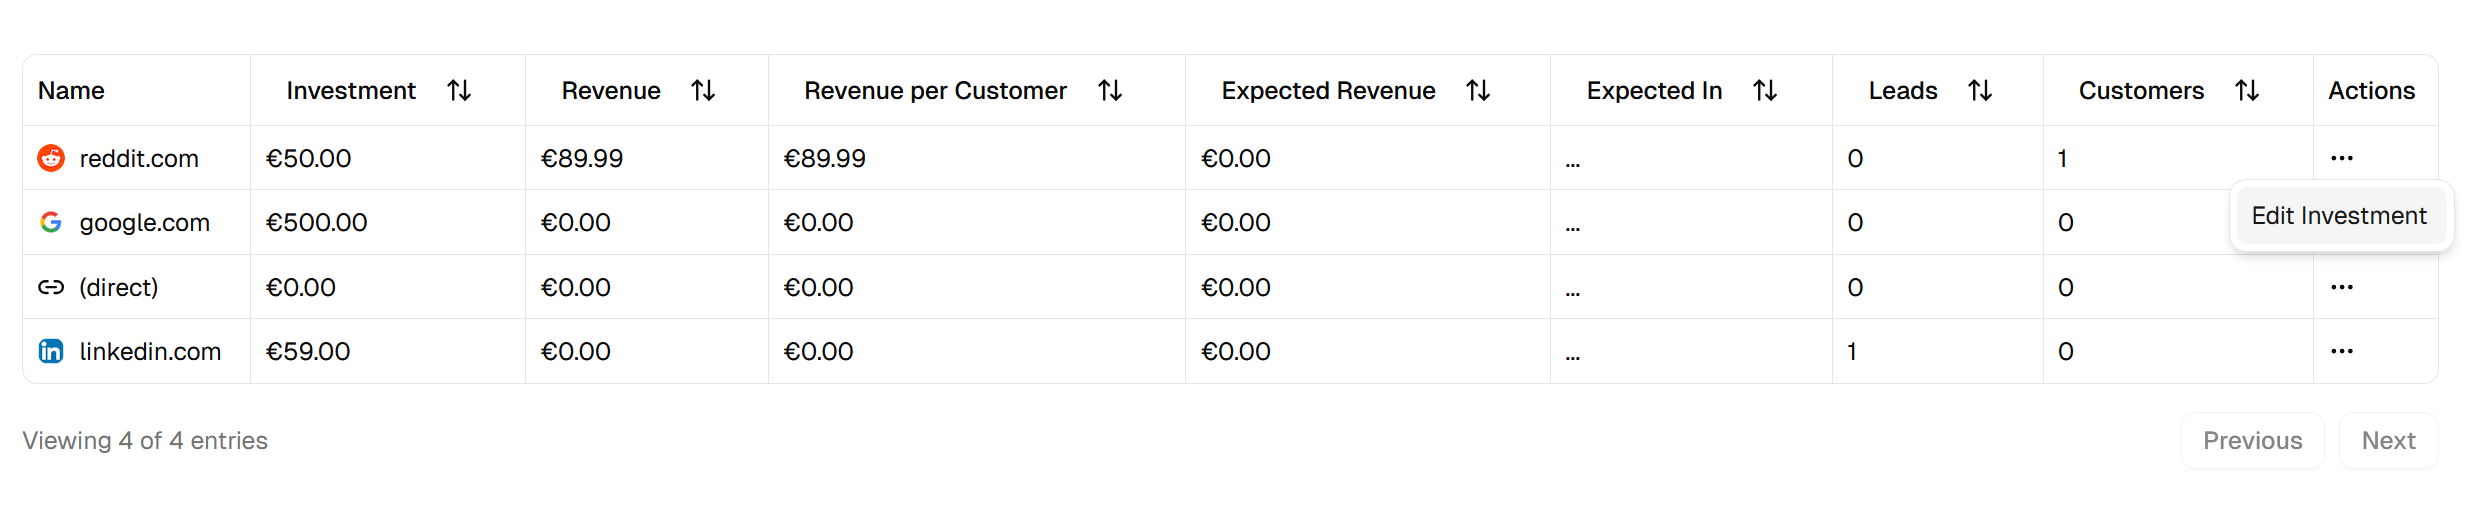
Input your investment sum and save it. Now, all KPIs will be recalculated.
Monitor performance
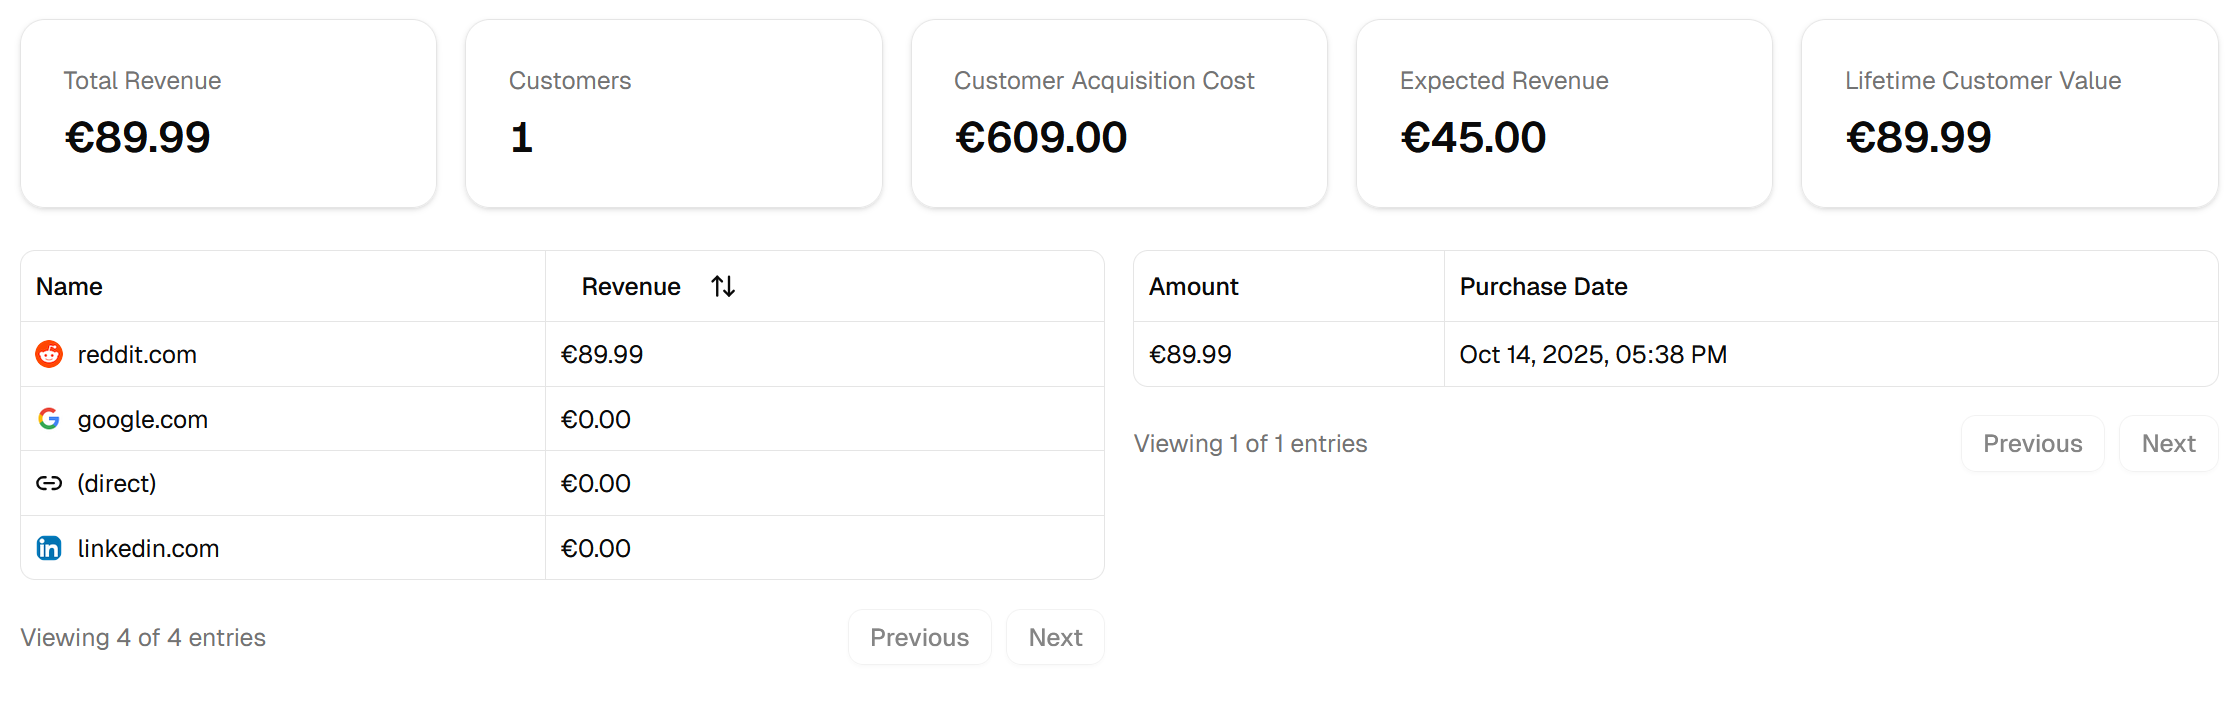
If you have added the script and placed the add lead and purchase REST Call you’re done.
Pretty simple, right?
You now can see where your customers come from, what they are worth, plus all real Key Performance Indicators under the Metrics page.